Pneumatic lift cylinders, your office chair, and you
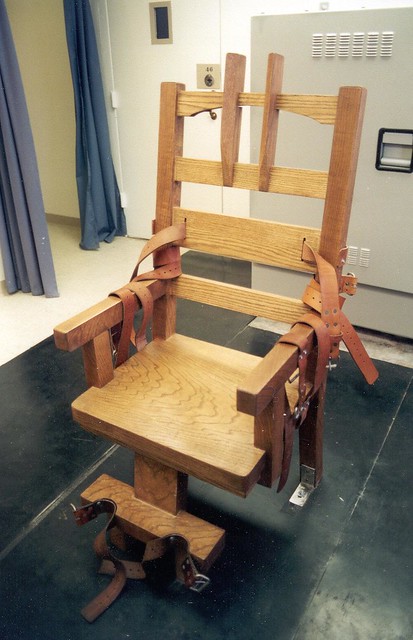
Ol' Sparky
It was an average day; the sun was probably shining, but I don't like bright and cheerful things so I was at home with the blinds closed and shades drawn, performing the vitally important task of staring at whatever was displayed on my computer monitor. Supporting my heroic efforts in this titanic endeavor was my long-suffering office chair, purchased in March of this very year. I say long-suffering because the poor thing was designed to hold a maximum of two hundred fifty pounds or so and I don't exactly belong in that weight class, which brings me to the point. After months of faithful service, my trusty steed succumbed to the inevitable, and to the laws of physics, and began to sink slowly to the floor. The culprit was, of course, the over-taxed and thus thoroughly abused pneumatic lift cylinder, central to the height-adjustmentibility and overall general comfortabilityness of any office chair. Being not terribly surprised, I stood up, returned the chair to its full height, and sat down to continue my critical web-surfing duties. After barely a minute the poor old cylinder gave out again and, after putting my considerable analytical skills to work, I surmised that I had a problem.
Normally when this happens I simply wait until this particular model of chair is on sale at OfficeMax and just buy a new one, but this was no normal day. Average, but not normal. And the damn thing wasn't on sale that week. Or the next. Or even the next. And there's no way in hell I'm about to drive all the way down there (almost eight miles) only to have to pay full price. No way, sir. Not this bird. Nix, nein, hayell no! So, in a spirit of . . . well . . . I don't know what it was suffice to say that I started to surf the interwebs in search of a solution, and that's exactly what I found: a replacement pneumatic cylinder! Yay! And this one was designed for someone in my particular weight class, i.e. robust, Rubenesque, rotund, round, &c. So I placed my order via the wonderful folks at Amazon.com and barely four days later I held in my very own wings my brand new pneumatic lift cylinder, ready and waiting for installation. And this, dear reader, is where the fun really began.
Step One: Remove replacement cylinder from box, inspect contents to make sure all parts are present.
Step Two: Sit in chair and allow cylinder to retract fully.
Step Three: Invert chair so that the chair is resting on the top of the chair back and the forward edge of the seat. The chair base (the star-shaped thing with the wheels, genius) should now be pointing up at an acute angle.
Step Four: Locate retaining clip on bottom of cylinder.
Step Five: Ignore daily call from telemarketer/collection agency/IRS/parole officer/whoever.
Step Six: Using flat-blade screwdriver, pry retaining clip from bottom of cylinder.
Step Seven: Remove washer from bottom of cylinder.
Step Eight: Slowly remove base from cylinder piston; cylinder sleeve will remain lodged in base hub.
Step Nine: Place chair base upside down on a table or suitable workbench.
Step Ten: Apply some WD-40 or other suitable lubricant between cylinder sleeve and base hub, tapping gently on the sleeve to allow lubricant to seep in.
Step Eleven: Using hammer or rubber mallet, bang on the bottom of the cylinder sleeve as hard as you can until it comes loose and falls on the floor.
Step Twelve: Have drink; that sum'bitch was wedged in there pretty damn tight.
Step Thirteen: Repeat step ten, this time with chair post and the seat tilt mechanism.
Step Fourteen: Place pipe wrench on chair post as close as possible to junction with tilt mechanism.
Step Fifteen: Twist wrench back and forth to remove chair post, using hammer to assist when and if necessary.
Step Sixteen: Have another drink; that thing was tighter than the damn base.
Step Seventeen: Insert new cylinder into chair base.
Step Eighteen: Only now realize that new cylinder is tapered to fit a 45mm diameter hub, and yours is 50mm in diameter.
Step Nineteen: Curse.
Step Twenty: Have another drink.
Step Twenty-one: Reinsert new cylinder into base again, noticing how the cylinder is now proud of bottom of base by a good three inches or so. (see fig. 1)
Step Twenty-two: Leaving base seated loosely, reattach chair body to chair post.
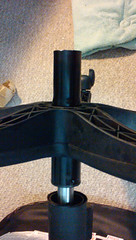
Step Twenty-three: Notice how chair leans backwards at an ominously dangerous angle. (see fig. 2)
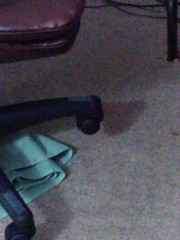
Step Twenty-four: Seat base fully on cylinder, noticing how the cylinder prevents the wheels from touching the floor. (see fig. 3)
Step Twenty-five: Curse profusely.
 Step Twenty-six: Resign yourself to the inevitable and sit in your new wobbly-ass chair.
Step Twenty-seven: Continue cursing and drinking until you think of a solution.
Step Twenty-eight: After an hour of so of drunken swearing and web-surfing, conceive of brilliant solution.
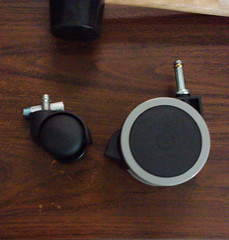
Step Twenty-nine: Order 4-inch diameter casters to solve ground-clearance problem. (see fig. 4)
 Step Thirty: Sit carefully on wobbly chair for five days until new wheels arrive.
Step Thirty-one: Remove old, useless wheels.
Step Thirty-two: Install snazzy new wheels.
Step Thirty-three: Stop drinking and write blog.
And that, boys and girls, is how you do that. I do certainly hope y'all have learned something and will benefit from my considerable expertise and experience and, by all means, don't enjoy the rest of your day.


No comments:
Post a Comment